intro
Imagine waking up to the sweet aroma of a freshly baked cherry cheese danish. The flaky pastry crust gives way to a creamy cheese filling and tart cherry topping. As you take your first bite, the flavors and textures take you to a cozy bakery.
In this guide, you’ll learn the secrets to making the perfect cherry cheese danish. You’ll discover its rich history and get step-by-step instructions for making it at home.

Whether you’re a seasoned baker or just starting out, this guide has everything you need to know. You’ll learn about essential ingredients, professional techniques, and tips for achieving bakery-quality results. With a recipe that makes 16 servings, you can share it with friends and family or enjoy it all by yourself.
Table of Contents
Key Takeaways
- Learn the history and origins of cherry cheese danish
- Discover the essential ingredients for a perfect danish recipe
- Master professional techniques for creating flaky pastry and creamy cheese fillings
- Get tips for achieving bakery-quality results in your own kitchen
- Enjoy a delicious cherry cheese danish with a simple and easy-to-follow recipe
- Impress friends and family with your newfound baking skills
- Experiment with different variations of the traditional danish recipe
The History Behind the Cherry Cheese Danish
Exploring the history of cherry danish and cheese danish is fascinating. These pastries have a long history, starting in Europe. They were simple treats at first but became rich with fruit and cheese fillings.
Danish immigrants brought their pastry traditions to the United States, especially to Racine, Wisconsin. By 1920, Racine had a large Danish community. This led to bakeries like O&H Danish Bakery, famous for their Racine kringle since 1949.
Origins of Danish Pastries
Danish pastries have a deep history, starting in 11th-century Turkey. The first white settlers came to Racine in 1835. Over time, Racine became a center for Danish immigrants. The 1950s saw the rise of Kringles, with flavors like Mediterranean apricots.
Evolution of Fruit and Cheese Fillings
The addition of fruit and cheese changed Danish pastries. Now, we have flavors like cherry cheese danish. Today, you can try everything from traditional cherry and cheese to Key Lime and Peach Cobbler.
Modern Interpretations
Today, bakers are making their own versions of cherry cheese danish. They use new ingredients and techniques. This has led to a wide range of delicious cherry danish and cheese danish, loved by everyone.
Why Cherry Cheese Danish Remains a Beloved Breakfast Treat
Enjoying a cherry cheese danish is a treat. The flaky cherry pastry and creamy filling mix perfectly. It’s crunchy and sweet, making it a favorite for many.
Danish pastries are loved worldwide. In the U.S., cherry cheese danish is a hit. Its sweet pastry and fruity filling win hearts.
Some key facts about cherry cheese danish include:
- Prep Time: 30 minutes
- Cook Time: 15 minutes
- Servings: 8 danishes
This treat is easy to make and perfect for any time. It’s great for busy mornings or special days.
Cherry cheese danish is also customizable. You can try different pie fillings and cream cheese. It’s a treat that never gets old.
| Ingredient | Quantity |
|---|---|
| Cream Cheese | 4 oz |
| Sugar | 1/4 cup |
| Egg Yolk | 1 |
The cherry cheese danish has a rich history and delicious taste. It’s a beloved breakfast treat. Whether you love cherry pastry or sweet pastry, it’s sure to please.
Essential Ingredients for the Perfect Cherry Cheese Danish
To make a tasty cherry filled pastry, you need a few important ingredients. You’ll need puff pastry sheets, cream cheese, granulated sugar, and cherry pie filling. Using top-quality ingredients is key for the best taste and texture.
Puff pastry sheets are a main part of the pastry dough. You can find them in most grocery stores. For the cherry filling, you can use canned pie filling or make your own with fresh or frozen cherries. The cheese filling includes cream cheese, granulated sugar, and egg yolks.
Pastry Dough Components
The pastry dough is vital for a cherry cheese danish. You’ll need 2 thawed puff pastry sheets. Also, an egg wash is needed to brush the pastry before baking.
Cherry Filling Options
For the cherry filling, you can use canned pie filling or make your own. To make your own, use 2 cups of cherries, 2 tablespoons of lemon juice, and 2 tablespoons of cornstarch. You can also add a tablespoon of Kirsch or a half teaspoon of cinnamon or nutmeg for extra flavor.
Cheese Filling Ingredients
The cheese filling is crucial for a cherry cheese danish. You’ll need 8 ounces of cream cheese, 1/4 cup of granulated sugar, and 1 egg yolk. Adding a teaspoon of vanilla extract can enhance the flavor.
| Ingredient | Quantity |
|---|---|
| Puff Pastry Sheets | 2 |
| Cream Cheese | 8 oz |
| Granulated Sugar | 1/4 cup |
| Egg Yolk | 1 |
| Vanilla Extract | 1 tsp |
| Cherries (pitted and halved) | 1 cup |
Making Your Own Cherry Cheese Danish at Home
To make a tasty cherry cheese danish, start by getting your ingredients ready. You’ll need thawed puff pastry, softened cream cheese, and a cherry filling. You can choose from cherry jam or fresh cherries for a unique taste.
The danish recipe is key for the pastry. It mixes flour, yeast, and sugar for a sweet, flaky crust. Adding vanilla or almond extract can make it even more special.
Now, let’s put your danish together. Spread the cherry filling on one half of the pastry, then add cream cheese. Fold the other half over to form a triangle or square.
Here’s what you’ll need for your cherry cheese danish:
- 12 Rhodes Dinner Rolls
- 4 ounces of cream cheese
- 1/4 cup of powdered sugar
- 1 large egg
- 1 cup of powdered sugar for the white icing
- 4-5 tablespoons of milk for the icing
- 1/2 teaspoon of vanilla extract
Preheat your oven to 400°F to bake your danish. Place it on a baking sheet lined with parchment paper. Bake for 16-18 minutes, until it’s puffy and golden. Let it cool for 5 minutes before serving.
This danish recipe lets you make a delicious cherry cheese danish at home. It’s perfect for breakfast or a snack. The mix of sweet and tangy flavors with a flaky crust is a treat. Follow these steps and use the right ingredients to make a danish that everyone will love.
Professional Tips for Laminating Danish Dough
Laminating dough is key to making a tasty cherry danish or cheese danish. This step involves folding and rolling the dough to create flaky layers. Doing it right can take your pastry to the next level.
Temperature control is crucial when laminating dough. Make sure butter and milk are at the right temperature. Also, handle the dough gently to avoid making it tough.
Folding Techniques
Folding dough is an art that needs patience and practice. You can try the simple fold, book fold, or letter fold. Each one gives your pastry a unique look and feel. For cherry danish, the simple fold works well. Cheese danish might look better with the book fold.
Common Mistakes to Avoid
When laminating dough, avoid a few common mistakes. Overworking the dough makes it tough and dense. Underworking it can make it lack structure. Also, don’t overproof the dough, or it will collapse.
By following these tips and practicing, you can make a beautiful, flaky pastry. It’s perfect for your cherry danish or cheese danish.
Creating the Perfect Cherry Filling
When making a delicious cherry pastry, the filling is key. You can use canned cherry pie filling or make your own. To get it just right, mix cherry juice, sugar, and cornstarch for the perfect balance.
Getting the right amount of ingredients is important. For example, you might need 1 cup of cherry pie filling and 4 oz of cream cheese. Adding spices or liqueurs like almond extract or cherry liqueur can also boost the flavor.
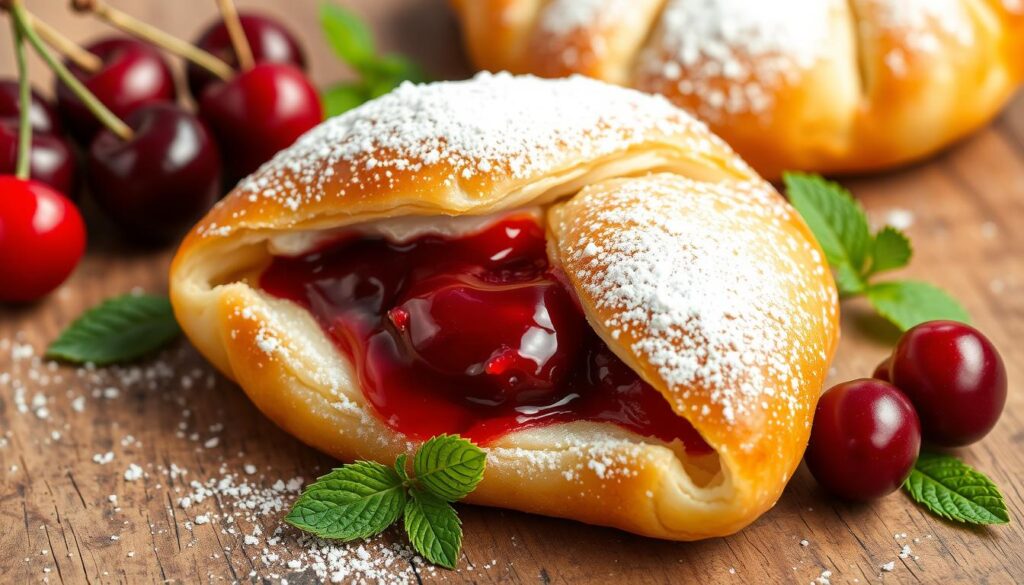
To keep your pastry from getting soggy, make sure your filling is just right. Cook it until it thickens, then let it cool. With a bit of practice, you’ll make a cherry filling that’s perfect for your cheese danish.
- Use 1 cup of cherry pie filling for a standard recipe
- Add 4 oz of cream cheese for a creamy texture
- Balance sweetness and tartness with cherry juice and sugar
By following these tips, you’ll make a cherry filling that’s sure to impress. Whether it’s for a special occasion or just a sweet treat, the right cherry filling is crucial.
| Ingredient | Quantity |
|---|---|
| Cherry pie filling | 1 cup |
| Cream cheese | 4 oz |
| Cherry juice | 2 tablespoons |
Mastering the Cheese Filling Component
To make a tasty cheese danish, you must perfect the cheese filling. You need to pick the right cheese, get the texture just right, and add some extra flavor. For a classic cheese danish, cream cheese is key. It’s mixed with sugar and vanilla to make a sweet, creamy filling.
Getting the cheese filling smooth and creamy is crucial. Mix it with sugar and vanilla, then whip until it’s smooth. You can also add lemon zest or chopped nuts to boost the flavor and texture.
Choosing the Right Cheese
The cheese you choose greatly affects the taste and feel of your danish. Cream cheese is popular, but mascarpone or ricotta can also work well. Think about the flavor and texture you want, and pick a cheese that fits.
Achieving the Ideal Texture
To get the perfect texture, mix the cheese filling ingredients well. Whip the cheese until it’s smooth, then add sugar and vanilla. Adding lemon zest or nuts can also improve the filling’s taste and feel.
- Use high-quality cheese that is fresh and has a good flavor.
- Mix the cheese filling ingredients correctly to achieve a smooth and creamy texture.
- Add flavor enhancements, such as lemon zest or chopped nuts, to enhance the flavor of the filling.
- Use the right amount of sugar and vanilla extract to balance the flavor of the filling.
By following these tips, you can make a delicious cheese danish. Whether it’s a traditional or sweet pastry, mastering the cheese filling is key to a great taste.
| Cheese Type | Flavor | Texture |
|---|---|---|
| Cream Cheese | Sweet and creamy | Smooth and creamy |
| Mascarpone | Rich and buttery | Smooth and creamy |
| Ricotta | Light and airy | Light and fluffy |
Assembly and Shaping Techniques
To make a stunning cherry cheese danish, you must learn how to assemble and shape it. This involves rolling out puff pastry, cutting it into shapes, and layering cheese and cherry fillings. With a few easy steps, you can make a fruit danish that looks like it was made by a pro.
Begin by rolling out the puff pastry evenly. You can cut it into squares or triangles for a unique look. For something more complex, try braiding puff pastry strips. This is great for a cherry cheese danish with a special touch.
When putting together your fruit danish, make sure to layer the cheese and cherries evenly. This ensures every bite tastes balanced. To stop the filling from leaking, press the pastry edges together. These simple steps will help you make a tasty and attractive cherry cheese danish for any event.
Here are some tips for assembling and shaping your cherry cheese danish:
- Use different shapes for a unique design
- Layer cheese and cherries evenly
- Seal the danish to stop filling leaks
- Try various braiding techniques for a detailed look
| Ingredient | Quantity |
|---|---|
| Puff Pastry | 1 box (17.3 ounces) |
| Cream Cheese | 8 ounces |
| Cherry Pie Filling | 1 can |
Baking Your Cherry Cheese Danish to Perfection
To bake a perfect cherry cheese danish, follow some key guidelines. Baking temperature should be between 375°F and 400°F. The baking time can vary, but it usually takes 15 to 30 minutes. Look for a golden brown crust and a firm, springy texture to know it’s done.
Here are some tips for baking your cherry cheese danish perfectly:
- Preheat your oven to the recommended temperature. Make sure to have a rack in the middle for even baking.
- Put your cherry danish on a baking sheet lined with parchment paper. Leave about 1 inch of space between each pastry for even cooking.
- Bake for the recommended time until your danish is golden brown and firm to the touch.
After baking, cool your cherry cheese danish properly to keep its flaky texture. Let it cool on a wire rack for at least 10-15 minutes before serving. If you’re looking for a tasty danish recipe, try a cherry danish with cherries and cheese. With these tips and a bit of practice, you’ll make a delicious cherry cheese danish that will impress everyone.

| Temperature | Baking Time | Visual Cues |
|---|---|---|
| 375°F – 400°F | 15-30 minutes | Golden brown crust, firm texture |
Serving Suggestions and Pairings
There are many ways to serve your cherry cheese danish. You can enjoy it as a sweet pastry on its own or with drinks and desserts. For a simple breakfast, try it with coffee or tea.
For a fancy brunch, pair it with a cherry dessert wine or a cool cocktail. Here are some great pairings:
- Earl Grey tea with the Lemon Crown Cake
- Iced tea or pink lemonade with the Raspberry Lemonade Mousse Cake
- Espresso or dessert wine with the King’s Chocolate Layer Cake
You can also serve it with fruits and nuts. The goal is to match flavors without overwhelming the cherry dessert.
Try different ways to serve your cherry cheese danish. It can make your meal more special, whether it’s a casual breakfast or a fancy brunch. Your sweet pastry will be a big hit.
| Dessert | Pairing Options |
|---|---|
| Lemon Crown Cake | Earl Grey tea, vodka lemonade |
| Raspberry Lemonade Mousse Cake | Iced tea, pink lemonade, springtime raspberry mojito |
| King’s Chocolate Layer Cake | Espresso, espresso martinis, dessert wine |
Troubleshooting Common Cherry Cheese Danish Issues
When making a cherry cheese danish, you might face some challenges. We’ll look at common problems and how to solve them. Whether it’s texture, filling, or baking issues, we’ve got advice for you.
Common issues include a soggy bottom or dry pastry. To get flaky pastry, follow the recipe closely and adjust baking time. For a cheese danish, use quality ingredients and avoid overmixing the filling.
Texture Problems
To prevent a soggy bottom, chill your pastry and bake at the right temperature. For a cheese danish, adding fruit preserves or cherry jam can balance flavors.
Filling Concerns
If your cheese filling is too runny, add more cream cheese or sugar. Try different fruits like strawberry or raspberry for a cherry cheese danish to find your favorite mix.
Baking Challenges
To avoid uneven browning or underbaked centers, rotate your danish halfway through baking. Monitor the temperature and adjust to ensure it’s golden brown and cooked.
By following these tips, you can make a delicious cherry cheese danish. Don’t be afraid to try new ingredients and flavors. Remember, practice makes perfect, especially with cheese danishes.
| Issue | Solution |
|---|---|
| Soggy bottom | Chill pastry, adjust baking time |
| Overly dry pastry | Adjust baking time, add fruit preserves |
| Runny cheese filling | Add more cream cheese, adjust sugar |
Conclusion
As you finish your journey into the world of cherry cheese danish, take a moment to appreciate its timeless charm. This pastry has a rich history and requires skill to make. You now understand the balance of flaky dough, tart cherries, and creamy danish recipe.
Whether baking for yourself, family, or a special event, you’re ready to make cherry cheese danish that’s as good as any bakery. Try new flavors and styles to make it your own. Enjoy the joy of mastering this classic recipe.
Keep improving your baking skills, remembering the passion and detail in every cherry cheese danish bite. Savor the moment, share with loved ones, and enjoy the satisfaction of making this beloved pastry in your kitchen.
FAQ
What is the history behind the cherry cheese danish?
The cherry cheese danish comes from traditional Danish pastries. These pastries were influenced by European traditions. Over time, they evolved with the addition of fruit and cheese fillings. This led to the creation of the cherry cheese danish we love today.
What makes the cherry cheese danish so popular as a breakfast treat?
The cherry cheese danish is loved for its sweet and tangy flavors. It also has a flaky pastry and creamy filling. Its cultural significance and status as a morning favorite make it a hit.
What are the essential ingredients for making a delicious cherry cheese danish?
To make a great cherry cheese danish, you need quality pastry dough, creamy cheese, and cherry filling. Use butter for flaky pastry. Cream cheese is best for the cheese filling. You can use canned or fresh cherries for the cherry filling.
How do you make a cherry cheese danish at home?
Making a cherry cheese danish at home is a multi-step process. First, prepare the pastry dough. Then, assemble the cheese and cherry fillings. Finally, shape the danish and bake it. The guide offers step-by-step instructions for perfect results.
What are some professional tips for laminating the danish dough?
The guide shares key techniques for laminating the dough. It covers folding methods and the importance of temperature control. It also warns against common mistakes to get flaky, layered pastry.
How do you create the perfect cherry filling for your danish?
The guide explores making the perfect cherry filling. It discusses the pros and cons of canned versus homemade fillings. It also shares tips for balancing sweetness and tartness with the cheese filling.
What is the key to achieving a creamy, smooth cheese filling?
The guide explains how to make a creamy cheese filling. It talks about choosing the right cheese, avoiding lumps, and enhancing flavors. These tips will make your filling extraordinary.
How do you properly assemble and shape a cherry cheese danish?
The guide shows how to assemble and shape your danish. It covers working with puff pastry, braiding designs, and layering fillings. These techniques prevent leakage during baking.
What are the secrets to baking the perfect cherry cheese danish?
The guide shares expert baking tips. It covers oven temperatures, signs of doneness, and cooling and storage. These tips help keep your pastry flaky and fresh.
How can you troubleshoot common issues when making cherry cheese danish?
The guide addresses common problems like texture and filling issues. It offers solutions to fix these problems. This helps you overcome challenges in making your danish.
for more recipes
dessert – not only sweet recipes
